
To clean the Ninja Blender handle, simply remove it and wash it with warm soapy water. The handle should be cleaned regularly to maintain hygiene and prolong its lifespan.
Welcome to our guide on cleaning your Ninja Blender’s handle. The handle is an essential part of the blender that requires regular cleaning to ensure a hygienic and long-lasting appliance.
We will walk you through the best method for cleaning the Ninja Blender handle.
By following these steps, you can easily maintain cleanliness and prolong the life of your blender handle.
So let’s dive in and learn how to keep your Ninja Blender handle squeaky clean.
Why It’s Important to Clean Your Ninja Blender Handle Regularly
Regularly cleaning your Ninja blender handle is an essential task many users overlook.
Neglecting to clean your blender handle can lead to various issues, including hygiene and food safety concerns, a shortened lifespan for your blender, and the build-up of residue and unpleasant odors.
In this article, we will explore why it is important to clean your Ninja blender handle regularly and how it can benefit your health and longevity.
Hygiene and Food Safety Concerns
When it comes to handling food and beverages, maintaining proper hygiene is crucial. The handle of your Ninja blender is the part you grip onto every time you use it, making it the most likely area for bacteria and germs to accumulate.
If not cleaned regularly, these organisms could transfer onto your hands and the food or drink you are preparing.
Additionally, if you share your blender with others, whether it be family members, friends, or even clients, if you use it in a professional setting, proper sanitation becomes even more important.
Avoiding the potential cross-contamination of harmful bacteria and maintaining a high standard of cleanliness is essential for promoting food safety and preventing the spread of illness.
Extending the Lifespan of Your Blender
Regular cleaning of your Ninja blender handle can significantly extend the lifespan of your appliance.
Over time, the accumulation of dirt, grime, and residue from multiple uses can cause the handle to deteriorate.
This can lead to potential malfunctions or even breakage, and ultimately, an expensive replacement is needed.
By cleaning the handle after each use, you can prevent the build-up of substances that may cause damage and ensure that your blender remains in optimal condition for longer.
Investing a small amount of time in cleaning regularly can save you a great deal of time and money in the long run.
Avoiding Build-up of Residue and Odors
Another compelling reason to clean your Ninja blender handle regularly is to avoid the build-up of residue and odors. With repeated use, food particles and liquids can get trapped in the crevices of the handle, forming residue.
This residue can not only be unsightly but also create an environment that promotes mold and bacteria growth.
| Benefits of Regular Cleaning | Dangers of Neglecting Cleaning |
|---|---|
| 1. Eliminates bacteria and germs 2. Prevents cross-contamination 3. Promotes food safety 4. Extends blender’s lifespan 5. Saves money on replacements 6. Avoids residue and mold buildup | 1. Increased risk of foodborne illnesses 2. Potential damage to handle 3. Ineffective blending due to malfunction 4. Unpleasant smells and tastes 5. The inconvenience of frequent replacements 6. Unhygienic preparation of food and beverages |
Furthermore, the accumulation of residue can give rise to unpleasant odors that may affect the taste and quality of the food and beverages you prepare.
By cleaning the handle regularly, you can prevent the growth of molds and bacteria and ensure that your blender remains fresh and odor-free.
In conclusion, cleaning your Ninja blender handle regularly is essential from a hygiene and food safety perspective. Still, it also helps to maintain the longevity of your blender and prevent the build-up of residue and odors.
By incorporating this simple step into your cleaning routine, you can enjoy peace of mind, a healthier kitchen environment, and prolong the life of your beloved Ninja blender.
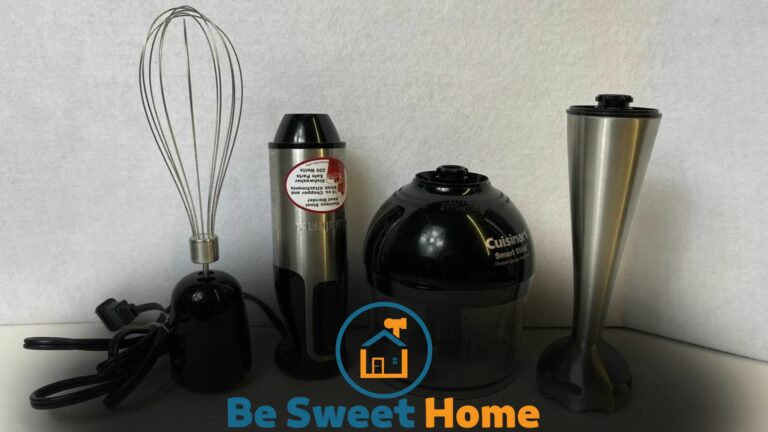
How to Clean Ninja Blender Handle?
Keeping your Ninja blender clean is essential for maintaining its performance and extending its lifespan. While you may regularly clean the blender jar and the blades, cleaning the handle is equally important to ensure optimal hygiene.
In this guide, we’ll walk you through the best way to clean the Ninja blender handle, ensuring it remains spotless and safe.
Materials Needed for Cleaning
Before starting the cleaning process, gather the following materials:
- Warm water
- Mild dish soap
- A soft cloth or sponge
- A small brush with soft bristles
- Paper towels or a clean, dry cloth
Step-by-step Cleaning Instructions
To clean the Ninja blender handle effectively, follow these step-by-step instructions:
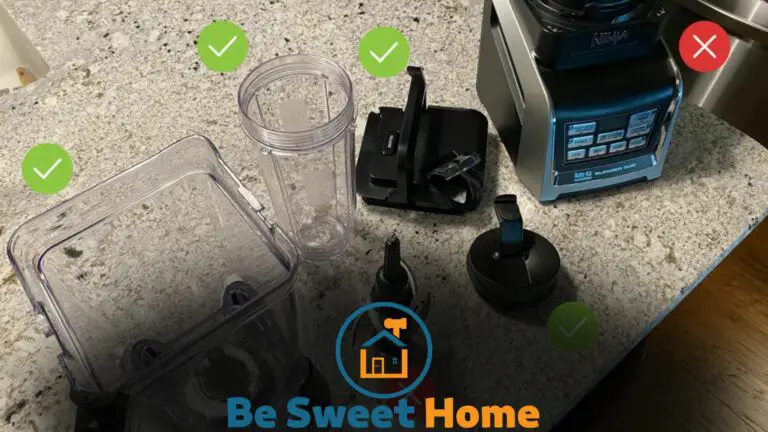
Removing the Handle From the Blender
To clean the handle thoroughly, removing it from the blender is best. Locate the screws or clips that secure the handle to the blender, and carefully remove them using a screwdriver or suitable tool. Set aside the screws or clips in a safe place to prevent misplacement.
Preparing a Cleaning Solution
Fill a sink or a bowl with warm water and add a small amount of mild dish soap. Stir the water gently to create a soapy solution. Ensure the water is not too hot to avoid damaging the handle.
Cleaning the Handle With a Soft Cloth
Dip a soft cloth or sponge into the soapy water and wring out any excess liquid. Gently wipe the handle, paying attention to the front and back surfaces. Use circular motions to remove any dirt or residue. For stubborn stains, apply a small amount of dish soap directly to the cloth and continue wiping.
Paying Attention to Difficult-to-clean Areas
Some areas of the handle, such as crevices or textured surfaces, may be more challenging to clean. Use a small brush with soft bristles to scrub away any dirt or grime in these areas gently. Ensure not to exert excessive pressure to avoid damaging the handle.
Drying and Reattaching the Handle
Once thoroughly cleaned, rinse it under warm water to remove any soap residue. Use paper towels or a dry cloth to pat the handle dry. Ensure no moisture is left before reattaching the handle to the blender.
Carefully reposition the handle in its original place and secure it using the screws or clips you had set aside.
Following these simple steps, you can effectively clean your Ninja blender handle and maintain its cleanliness and functionality.
Remember to clean the handle regularly to prevent dirt and bacteria buildup. With proper care and maintenance, your Ninja blender will continue serving you delicious and healthy blends for years.
Additional Tips and Tricks for Effective Cleaning
Discover expert tips and tricks for effectively cleaning your Ninja Blender handle. Learn the best techniques to keep your blender handle spotless and safe.
Using Natural Cleaning Agents
To ensure the cleanliness and longevity of your Ninja Blender handle, it is important to use natural cleaning agents. These alternatives effectively remove dirt and grime and eliminate the risk of harmful chemical residues.
Here are some natural cleaning agents you can use:
- Vinegar: Combine equal parts of white vinegar and water in a spray bottle. Spray the mixture onto the handle and let it sit for a few minutes. Then, wipe it off with a clean cloth.
- Lemon juice: Squeeze fresh lemon juice onto a sponge or cloth and rub it gently on the handle. The citric acid in lemon juice helps to break down grease and stains.
- Baking soda: Make a paste by mixing baking soda with water. Apply the paste to the handle and let it sit for a few minutes before rinsing it with warm water.
Dealing With Stubborn Stains or Residue
Sometimes, stubborn stains or residue may require a little extra effort to be removed. Here are some techniques you can try:
- Soaking: If the handle has stubborn stains or residue, fill a sink or basin with warm water and add a few drops of dish soap. Submerge the handle in the soapy water and let it soak for 15-20 minutes. Then, use a soft brush or sponge to remove the stains or residue.
- Using a toothbrush: For hard-to-reach areas or tight crevices, use a toothbrush dipped in the natural cleaning agent of your choice. Gently scrub the handle using circular motions to remove stubborn stains or residue.
- Steam cleaning: If you have a steam cleaner, you can remove stubborn stains and kill bacteria on the handle. Steam cleaning is a safe and efficient method that requires minimal effort.
Taking Preventive Measures to Keep the Handle Clean
Prevention is key when it comes to keeping your Ninja Blender handle clean. By following these simple preventive measures, you can maintain its shine and extend its lifespan:
- Wipe it after each use: After every blending session, take a moment to wipe down the handle with a damp cloth or sponge. This will help prevent any buildup of food particles or stains.
- Avoid submerging in water: While the Ninja Blender is dishwasher-safe, it is recommended to avoid submerging the handle. Instead, detach it from the blender base and clean it separately.
- Use a handle cover: Consider using a handle cover or sleeve to protect the handle from direct contact with food and liquids. This will reduce the risk of stains and make cleaning easier.
Cleaning Frequency Recommendations
To maintain optimal hygiene and performance, cleaning your Ninja Blender handle regularly is important. Here are some cleaning frequency recommendations:
| Type of use | Cleaning frequency |
|---|---|
| Infrequent use (A few times a week) | After each use |
| Occasional use (A few times a month) | Once a week |
| Occasional use (A few times a month) | Every two weeks |
Following these recommendations will keep your Ninja Blender handle clean and ensure that it remains in good condition for years to come.
Remember to prioritize natural cleaning agents, tackle stubborn stains with care, take preventive measures, and establish a regular cleaning routine.
Common Mistakes to Avoid When Cleaning the Ninja Blender Handle
Cleaning your Ninja Blender handle is essential for maintaining its appearance and ensuring proper hygiene. However, it’s important to be aware of common mistakes people make when cleaning this kitchen appliance.
By avoiding these mistakes, you can prolong the lifespan of your Ninja Blender and keep it in optimal condition.
Let’s take a closer look at these common mistakes and how you can avoid them.
Using Harsh or Abrasive Cleaners
When it comes to cleaning the Ninja Blender handle, one common mistake is using harsh or abrasive cleaners. Cleaning agents that are too strong can damage the handle’s finish and even leave scratches behind.
To ensure the longevity of your blender, it’s best to use mild dish soap or a cleaning solution specifically designed for kitchen appliances. These gentle cleaners will effectively remove any dirt or grease without causing any harm.
Neglecting to Clean Hard-to-reach Areas
The next mistake to avoid is neglecting to clean the hard-to-reach areas of the Ninja Blender handle. It’s easy to focus on the visible parts of the handle and overlook those small crevices and corners where dirt and grime can accumulate.
To thoroughly clean the handle, use a small brush or toothbrush to reach these tight spots. This will ensure no residue is left behind, ultimately promoting a more hygienic environment in your kitchen.
Forgetting to Dry the Handle Thoroughly
Thoroughly drying the Ninja Blender handle is another important step often overlooked. After cleaning, dry the handle completely to prevent water spots or moisture buildup.
Leaving the handle wet can also result in the growth of bacteria or mold, which can harm your health. Take a soft cloth or paper towel and carefully dry the handle, paying close attention to any crevices or areas that may collect water.
Overlooking the Importance of Regular Cleaning
Last, some people underestimate the importance of regular cleaning for their Ninja Blender handles. Regular cleaning not only maintains the handle’s appearance but also ensures that it remains free from any build-up of dirt or residue.
Cleaning your blender handle after each use can prevent stubborn stains from forming and maintain its optimal performance for years.
So, the next time you clean your Ninja Blender handle, avoid these common mistakes. Use gentle cleaners, thoroughly clean hard-to-reach areas, dry the handle completely, and make regular cleaning a part of your routine.
By following these guidelines, you can keep your Ninja Blender handle looking and functioning like new for a long time.
Troubleshooting: How to Deal With Persistent Stains Or Odors
While the Ninja Blender is a fantastic kitchen appliance, it’s not uncommon to encounter persistent stains or odors that may seem challenging to eliminate.
Fortunately, with a few simple techniques and some troubleshooting, you can bring back the cleanliness and freshness of your blender handle.
In this section, we’ll explore how to identify the cause of persistent issues, special cleaning techniques for specific problems, and when it might be necessary to seek professional assistance.
Identifying the Cause of Persistent Issues
Before diving into the cleaning process, it’s essential to understand the root cause of persistent stains or odors. While food particles and residue are common culprits, mold, mildew, or manufacturing defects might also be to blame.
Identifying the cause helps determine the cleaning approach and prevents the issue from reoccurring.
Special Cleaning Techniques for Specific Problems
Dealing with stubborn stains or odors requires targeted techniques to achieve optimal results.
Here are a few specialized cleaning methods for different types of problems:
1. Food Residue Buildup
If your blender handle is plagued by stubborn food residue, thoroughly washing it with warm water and mild dish soap should do the trick. Use a soft-bristled brush or toothbrush to scrub away the buildup for those hard-to-reach spots gently. Rinse with clean water and allow the handle to air dry completely.
2. Mold or Mildew
If you notice a musty smell or see dark spots on the handle, mold or mildew might be at play. In this case, create a solution of equal parts white vinegar and water. Soak a cloth or sponge in the mixture and wipe down the affected areas. Repeat as necessary until the stains and odor are eliminated. Finally, rinse the handle thoroughly and let it air dry.
Seeking Professional Assistance If Necessary
For persistent stains or odors that resist your efforts or if you suspect a manufacturing defect, it may be necessary to seek professional assistance.
Contacting the Ninja Blender customer support team, a kitchen appliance repair service, or the store where you purchased the blender can provide the expertise needed to address the issue effectively.
By identifying the cause of persistent issues, using special cleaning techniques for specific problems, and seeking professional assistance if necessary, you can ensure your Ninja Blender handle remains clean and fresh for future use.
Conclusion
Cleaning your Ninja Blender handle is essential to maintaining its longevity and efficiency. Following the step-by-step guide in this blog post, you can ensure that your blender handle remains free from dirt, grime, and bacteria.
Remember to be gentle and thorough in cleaning to avoid damage to the handle.
Regular cleaning will keep your blender handle hygienic and maintain its overall performance.