
To fix a blender blade that is not spinning, check for obstructions and ensure the base is engaged correctly. Next, examine the blender’s coupling for damage or wear.
Blenders are a staple in kitchens for making smoothies, purees, and a variety of blended concoctions. A common issue many users face is the blender blade not spinning, which can halt your food preparation process and cause frustration.
This complication can arise from various factors, such as jammed food particles, a misaligned base, motor issues, or a worn-out blade assembly. Identifying and resolving the problem promptly ensures the longevity of your blender and the consistency of your recipes.
Maintaining your appliance with regular checks and cleanups can minimize the risk of mechanical failures, saving you time and the cost of potential repairs or replacements.
Common Causes for Blender Blade Immobility
When your blender blades stop spinning, it can be pretty frustrating. Understanding the root causes is the first step to fixing the problem efficiently. Below, explore why blender blades could become immobilized and learn how to quickly identify and resolve the issues.
Obstruction By Food Particles
Blender blades can get jammed due to stuck food pieces. This typically happens after blending large or fibrous ingredients. To avoid future blockages:
- Chop ingredients into smaller pieces.
- Regularly clean the blades and jar.
- Check for obstructions before use.
Wear and Tear of Blade Assembly
The blender’s blade assembly consists of several parts that can wear out over time. Blades can become dull, or the bearings may fail, leading to immobilization. Regular maintenance includes:
- Inspecting blade sharpness.
- Replacing worn-out seals or gaskets.
- Checking for loose blade assembly parts.
Motor Issues
Motor problems could also cause blades to stop spinning. Signs include odd noises or a burning smell. To keep your blender’s motor in good shape:
| Do’s | Don’ts |
|---|---|
| Give it a rest between blends. | Overfill the blender jar. |
| Keep vents clear of debris. | Run it for too long non-stop. |
| Seek professional repair for internal issues. | Ignore unusual operational signs. |
If these steps don’t resolve the blade immobility, it may be time to consult a professional or consider a replacement.
Initial Troubleshooting Steps
When your blender blades refuse to spin, it can stop your culinary creation. Before calling it quits or heading to the repair shop, try these easy steps to fix the problem.
Unplugging and Inspecting the Appliance
Safety first Always unplug your blender before checking any parts. Look over the device for apparent damage. Pay special attention to the blender’s base. Check for any foreign objects or food buildup that might be stopping the blades. Use a cleaning brush to clean around the blade assembly gently.
Checking Power Supply and Settings
- Ensure the outlet works by plugging in another device.
- Is the blender’s power switch on? It sounds simple, but it’s worth checking.
- Check the blender settings. Some models won’t spin unless they are set correctly.
Manual Blade Rotation Test
- Carefully try to turn the blades by hand (the appliance should still be unplugged).
- The blade assembly could be jammed or worn out if they don’t move freely.
- If they spin without issue, the motor could be the culprit.
Cleaning the Blender for Smooth Operation
Blender maintenance is essential for optimal performance. A common issue is when blender blades stop spinning. This can often be fixed by ensuring the blender is clean and unobstructed.
Let’s look at how to clean the blender properly for smooth operation.
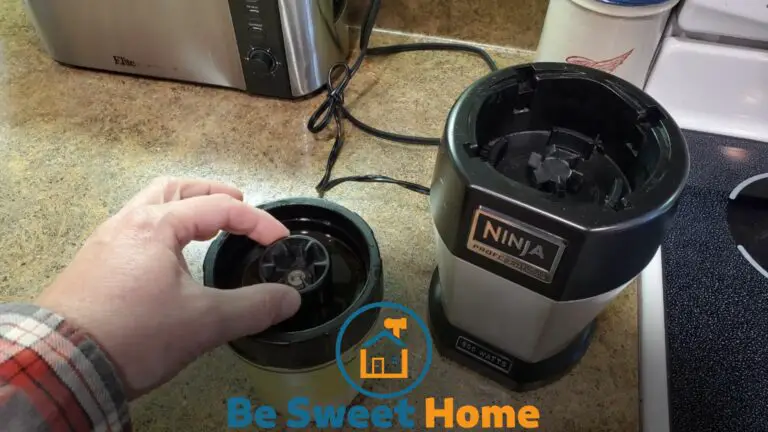
Disassembling the Blender
Start by unplugging the blender to ensure safety. Next, remove the blending jar from the base. Twist off the bottom part that holds the blade in place. Take out the rubber gasket and the blade assembly. Now, you have access to all parts that require cleaning.
Deep Cleaning the Blade and Jar
Use warm, soapy water for cleaning. Here’s a step-by-step guide:
- Soak the parts like the gasket, blade assembly, and jar in the soapy water.
- Use a brush to scrub away any residue on the blades and gasket.
- Clean the jar with a sponge, focusing on the base where food particles can hide.
- Rinse all the parts with clean water and let them dry completely.
Inspect the blade for any damage. It might be time to replace it if it’s dull or damaged.
Reassembling After Cleaning
Make sure every part is dry. Reassembling the blender is easy:
- Place the blade assembly back in the jar base. Make sure it sits evenly.
- Return the rubber gasket to its position, ensuring it’s flat and uncreased.
- Screw the bottom part tightly to avoid leaks.
- Put the jar back on the blender base, plug it in, and test it.
A well-maintained blender ensures smoothies and sauces are a breeze to make. Regular cleaning keeps the blade spinning without hiccups. Remember these steps for stress-free blending!
Replacing a Faulty Blade Assembly
Is your blender’s blade refusing to spin? A faulty blade assembly might be the culprit. Rolling up your sleeves and tackling this issue can bring your blender back to life. This guide walks you through replacing a faulty blade assembly with ease.

Identify the Correct Replacement Part
First things first, pinpoint the correct replacement blade assembly. You’ll want to check your blender’s make and model. It ensures compatibility. Once you have this information, order the correct part from a reliable supplier.
Step-by-step Guide To Replace Blade
- Unplug the blender for safety.
- Remove the glass container from the base.
- Locate the blade assembly at the bottom.
- Use a wrench to twist off the retaining nut.
- Lift off the old blade assembly cautiously.
- Place the new blade assembly onto the base.
- Secure it with the retaining nut.
- Tighten firmly, but do not overdo it.
Testing the Blender Post-replacement
Once the new blade is in place, it’s testing time. Reassemble your blender. Make sure everything is tight and secure. Add water to the pitcher and give it a trial run. Listen for smooth operations.
No strange noises or vibrations should be present. If your blender runs quietly and effectively, you’ve nailed the blade replacement!
When To Seek Professional Repair
Preventive Maintenance and Care Tips
Maintaining your blender means fewer surprises. Are blender blades not spinning? No worries. Learn how to keep your blender at its best. Proper care extends its lifespan. It saves time and money.
Regular Cleaning and Storage Advice
Blenders work hard to blend, puree, and chop ingredients. A clean blender is a happy blender. Regular cleaning keeps it running smoothly.
- Unplug and disassemble after each use.
- Wash blades and jar with warm, soapy water.
- Rinse thoroughly to remove soap residue.
- Dry all parts thoroughly before reassembling.
- Store in a dry place to prevent mold or odor.
Avoiding Overloading the Blender
Pushing your blender too hard can cause it to stop working. It’s simple.
- Read the manual for max capacity.
- Fill only to the suggested level.
- For thicker mixes, blend in batches.
- Start slow, then gradually increase speed.
Routine Blade Inspection and Sharpening
Blades are the heart of your blender. They need attention, too.
- Inspection: Check for food stuck on blades.- Look for signs of rust or damage.
- Sharpening: Use a sharpening stone for dull blades.- Follow the blade’s angle for a sharp edge.
Keep the blades sharp for the best blend.
Frequently Asked Questions for How To Fix Blender Blade Not Spinning
Why is My Blender Blade Not Rotating?
The blender blade may not rotate due to obstruction, misalignment, worn-out couplings, or a burnt-out motor.
What Causes Blender Blades To Jam?
Food particles, improper assembly, or dull blades can jam blender blades, preventing them from spinning smoothly.
How Do I Unstick a Blender Blade?
To unstick a blender blade, ensure it’s unplugged, then manually rotate the blade or use a utensil to dislodge any debris carefully.
Can a Blender Motor Burn Out?
Yes, a blender motor can burn out due to overheating, overloading, or electrical surges during operation.
How To Maintain Blender Blades?
Regular cleaning, avoiding overloading, and sharpening the blades when needed can help maintain blender performance and longevity.
Conclusion
Overcoming a non-spinning blender blade can be simple with the right approach. Remember to inspect, clean, and realign. If problems persist, consult a professional. Keeping your blender in top shape ensures smooth operation for your kitchen ventures. Ready to blend?