

To clean an Oster blender, follow these step-by-step instructions for a pristine appliance. Keeping your blender clean is essential for maintaining its performance and prolonging its lifespan.
Whether you use your Oster blender for making smoothies, soups, or purees, regular cleaning is necessary to remove residue and ensure hygienic food preparation.
This guide will walk you through a simple step-by-step process to clean your Oster blender effectively.
Following these instructions lets you keep your blender in top condition and enjoy hassle-free blending for years.
The Importance of Regularly Cleaning Your Oster Blender
Regularly cleaning your Oster Blender is essential to maintain its performance and extend its lifespan.
Follow this step-by-step guide to keep your blender in top shape and ensure optimal blending results.
Why is Regular Cleaning Essential for Optimal Blender Performance?
Regularly cleaning your Oster Blender is crucial in maintaining its optimal performance. When using your blender to prepare various ingredients and beverages, residue, food particles, and oils can accumulate over time.
This build-up can negatively affect the blender’s functionality and efficiency.
Here are some reasons why regular cleaning is essential:
- Prevents residue build-up: Cleaning your Oster Blender after each use prevents residue build-up, ensuring smooth blending and preventing clogs. Residue build-up can hinder the blade’s movement and cause less effective blending results.
- Extends the lifespan of your blender: Proper cleaning helps extend the lifespan of your Oster Blender. Left uncleaned, residue and food particles can deteriorate the blender’s components, such as the motor and blade assembly. By regularly cleaning and maintaining your blender, you can ensure its longevity and functionality.
- Avoids cross-contamination: Cleaning your blender is crucial to avoid cross-contamination between ingredients. When blending different ingredients, residues, flavors, and food particles can mix if improperly cleaned. This can impact the taste and quality of your future recipes and pose a potential health risk.
- Promotes safe usage: Regularly cleaning your Oster Blender promotes safe usage. Food residues can become a breeding ground for bacteria and mold if not cleaned thoroughly. This can compromise food safety and potentially lead to foodborne illnesses.
- Maintains optimum performance: Properly cleaning your blender ensures that each blending session is performed at its best. Removing residue and food particles from the blades, jar, and other components allows the blender to operate smoothly, maintaining its efficiency and producing consistent results.
How Proper Cleaning Maintains Food Safety and Hygiene
Keeping your Oster Blender clean is paramount to maintaining food safety and hygiene. When handling food items, ensuring cleanliness is crucial to prevent contamination and promote healthier consumption.
Here’s why proper cleaning is critical to food safety and hygiene:
- Eliminates bacteria and mold: Cleaning your blender regularly eliminates any bacteria or mold that can grow due to leftover food residues, ensuring that your blender remains a safe and hygienic tool for food preparation.
- Prevents cross-contamination: Thoroughly cleaning your blender prevents cross-contamination between ingredients. Proper washing removes potential allergens, toxins, or flavors that could intertwine with new recipes, ensuring the safety of those with dietary restrictions or sensitivities.
- Enhances the taste and quality of your recipes: By regularly cleaning your Oster Blender, you maintain the integrity and quality of your recipes. Eliminating lingering flavors or odors from previous uses ensures that your blended creations retain their intended taste and aroma.
By understanding the importance of regularly cleaning your Oster Blender, you can ensure its longevity, maintain food safety and hygiene, and enjoy optimal blending performance in every use.
Step 1: Gather the Necessary Cleaning Supplies
Before you begin cleaning your Oster blender, it is crucial to have all the necessary cleaning supplies at hand.
This will ensure a smooth and efficient cleaning process, allowing you to maintain the performance and longevity of your blender.
A List of the Items Needed for Cleaning the Oster Blender
- A dishwashing detergent or a mild soap
- A sponge or a soft-bristle brush
- A clean dishcloth or a microfiber cloth
- A small brush or a toothbrush for hard-to-reach areas
- Warm water
These readily available items will make the cleaning process more convenient, allowing you to remove any residue or build-up from the blender easily.
The Importance of Using Gentle and Non-abrasive Materials
When cleaning your Oster blender, it is crucial to use gentle and non-abrasive materials.
This ensures that the blender’s surfaces and components are not scratched or damaged during cleaning, promoting long-term usage and functionality.
Gently cleaning the blender with a soft sponge or a soft-bristle brush helps to remove any dirt or stains without causing any harm.
Avoid using abrasive materials such as harsh scrub brushes or scouring pads, as they can scratch the blender’s surfaces and affect its appearance.
In addition, using mild soap or dishwashing detergent mixed with warm water provides an effective yet gentle cleaning solution.
This combination allows you to break down any grease or residue in the blender, leaving it clean and ready for use.
Always rinse the blender thoroughly with clean water after cleaning to ensure no soap residue is left behind.
Step 2: Dismantle the Blender for Easy Cleaning

Now that you have gathered all the necessary cleaning supplies, it’s time to dismantle your Oster blender for easy and thorough cleaning.
By breaking down the different blender parts, you can ensure that every nook and cranny is free from residue and grime. Here are the steps to follow:
Breaking Down the Different Parts of the Oster Blender
Before you begin dismantling your Oster blender, it’s essential to familiarize yourself with its various components. Here’s a breakdown of the main parts:
| Component | Description |
|---|---|
| Blender Jar | This is the main container where you place your ingredients. It usually has measurement markings, a lid, and a handle. |
| Blade Assembly | The lid covers the blender jar and prevents splatters or spills during blending. |
| Lid | The lid covers the blender jar and prevents any splatters or spills during blending. |
| Base | The base contains the motor and controls of the blender. Ensure the blender is unplugged before handling the base. |
Tips for Safely Removing the Blade Assembly and Other Removable Components
Dismantling the blade assembly and other removable components requires careful handling to prevent accidents or damage. Here are some tips to keep in mind:
- Unplug the blender: Before removing any parts, always unplug the blender from the power source to avoid accidents.
- Remove the blender jar: Lift it off the base and set it aside.
- Remove the lid: If your blender has a separate lid, remove it by lifting it gently from the top of the blender jar.
- Remove the blade assembly: Carefully unscrew it from the blender jar by twisting it counterclockwise. Use caution when handling the sharp blades to avoid any injuries.
- Remove any other removable components: If any additional parts can be detached, such as gaskets or seals, remove them following the manufacturer’s instructions. Take note of the specific cleaning guidelines for each component.
Remember, safety should always be your top priority when handling appliances.
Following these steps and tips, you can easily dismantle the Oster blender and prepare it for a thorough cleaning in the next step.
Step 3: Cleaning the Blender Jar and Lid
Regularly cleaning the blender jar and lid is essential to maintain its performance and ensure hygienic blending.
In this step, we will discuss the instructions to effectively clean the blender jar and lid, along with the recommended cleaning solution and technique.
Instructions
Follow these simple steps to ensure a thorough cleaning of your Oster blender jar and lid:
- Start by disassembling the blender. Carefully remove the blender jar from the base and unscrew the lid.
- Rinse the blender jar and lid with warm water to remove any residue or particles from the previous use.
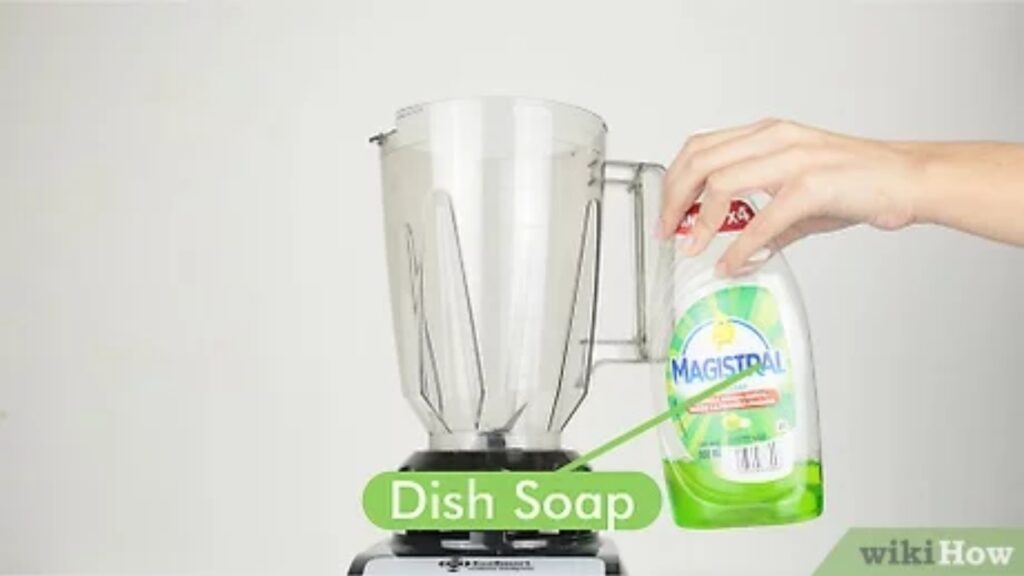
- Mix a solution of warm water and dish soap for stubborn stains or odors. Apply a few drops of dish soap to the blender jar and lid.
- Use a soft sponge or brush to scrub the blender jar and lid, ensuring you reach all the corners and edges.
- Pay special attention to the blade assembly, as food particles can get stuck in the crevices. Gently scrub the blades with a sponge or brush to remove any debris.
- Once thoroughly cleaned the blender jar and lid, rinse them with warm water to remove any remaining soap residue.
- Allow the blender jar and lid to air dry completely before reassembling and using them.
The Recommended Cleaning Solution and Technique
We recommend using warm water and dish soap to clean your Oster blender jar and lid effectively. The warm water helps to loosen any residue or particles, while the dish soap is a powerful cleaner to remove stains and odors.
When using the cleaning solution, apply a few drops of dish soap to the blender jar and lid and scrub them thoroughly with a soft sponge or brush. This technique will help to dislodge any stuck-on food particles and ensure a thorough cleaning.
Rinse the blender jar and lid with warm water after cleaning to remove any soap residue. It’s important to allow the blender jar and lid to air dry completely before reassembling, as wet components can cause mold or mildew growth.
Following these instructions and using the recommended cleaning solution and technique, you can keep your Oster blender jar and lid clean, hygienic, and ready for your next blending adventure!
Step 4: Cleaning the Blade Assembly
One of the most crucial steps in cleaning your Oster blender is thoroughly cleaning the blade assembly. This component is responsible for blending and chopping ingredients, making it prone to food residue buildup.
To ensure optimal performance and hygiene, here is a step-by-step guide on safely cleaning and removing food residue from the blade assembly.
How to Safely Clean and Remove Any Food Residue From the Blade Assembly
Cleaning the blade assembly requires careful attention to ensure both effectiveness and safety. Follow these steps to keep your blade assembly clean:
- Firstly, ensure the blender is turned off and unplugged to avoid accidents. Safety should be your utmost priority.
- Start by disassembling the blender. Carefully remove the pitcher or jar from the base and detach the blade assembly from the bottom. Be cautious when handling the sharp blades.
- Then, rinse the blade assembly under warm running water to remove any loose particles or residue. Use your fingers or a brush to scrub any stubborn food debris gently.
- Next, apply dish soap onto the blade assembly and scrub with a soft brush. Pay close attention to the areas between the blades where residue accumulates.
- Rinse the blade assembly thoroughly with warm water to remove any soap residue.
- Mix warm water and vinegar (1:1 ratio) for a deeper clean, and soak the blade assembly for about 15 minutes. Vinegar helps disinfect and remove tough stains.
- After soaking, rinse the blade assembly with warm water to remove the lingering vinegar smell or residue.
- Finally, use a clean cloth or paper towel to dry the blade assembly before reassembling your blender. Make sure it is completely dry to prevent moisture-related issues.
Following these steps, you can thoroughly clean your Oster blender’s blade assembly, ensuring it remains in prime condition for future blending adventures.
The Importance of Thorough Cleaning to Prevent Bacterial Growth
Properly cleaning the blade assembly is vital in avoiding bacterial growth and ensuring the performance and longevity of your Oster blender. When food residue is left behind, it provides an ideal environment for bacteria to multiply.
These bacteria can contaminate your blended creations without adequate cleaning, compromising their safety and freshness.
Regularly cleaning your blade assembly prevents bacterial growth and enhances your blended recipes’ overall taste and quality.
Maintaining a clean blender allows you to enjoy healthy and delicious smoothies, sauces, soups, and more without concerns.
Step 5: Cleaning the Blender Base
Keeping your Oster blender clean ensures it functions smoothly and provides delicious, blended creations.
In this step, we will focus on cleaning the blender base, which includes the motor base and control panel.
Follow these tips and guidelines to clean your blender base effectively without causing any damage.
Tips for Cleaning the Motor Base and Control Panel Without Damaging the Blender
When it comes to cleaning the motor base and control panel of your Oster blender, it’s important to follow these guidelines to avoid any damage:
- Unplug the blender before cleaning to ensure your safety.
- Avoid using excessively wet or soapy materials. Instead, wipe the surface using a damp cloth or sponge.
- Do not submerge the motor base or control panel in water or liquid to prevent electrical damage.
- Avoid using abrasive cleaners or rough materials that could scratch the surface. Opt for soft, non-abrasive cloths or sponges.
- Gently wipe the surface of the motor base and control panel to remove any dirt, residue, or food particles.
- Pay extra attention to the areas around buttons or knobs where spills and stains may occur.
- Dry the motor base and control panel thoroughly before plugging it back in and using the blender.
How to Remove Any Spills or Stains From the Base
If spills or stains have occurred on the base of your Oster blender, follow these steps to remove them effectively:
- Unplug the blender and ensure it is powered off before proceeding.
- Dampen a soft cloth or sponge with warm water.
- Gently rub the cloth or sponge over the spills or stains, applying light pressure to loosen the dirt.
- If the stains are stubborn, use a mild dish soap mixed with warm water.
- Rinse the cloth or sponge thoroughly and wring out any excess liquid.
- Continue to clean the spills or stains by gently rubbing the cloth or sponge in a circular motion.
- Once the spills or stains are removed, use a dry cloth to remove any remaining moisture.
- Allow the base to air dry completely before plugging it back in and using the blender.
Cleaning the blender base is an essential step in maintaining the performance and longevity of your Oster blender.
By following these tips and guidelines, you can keep your blender base clean and ensure it continues to blend your favorite ingredients to perfection.
Conclusion
Maintaining a clean Oster Blender is vital for optimal performance and longevity. Following these simple steps, you can easily keep your blender in top-notch condition.
Regularly disassembling the parts, washing them thoroughly, and drying them properly will prevent any buildup of residue or odors.
Remember to handle the blades with caution and use a gentle touch when cleaning. With proper care, your Oster Blender will remain your reliable kitchen companion for years.