Identify the issue and proceed with the appropriate repair strategy to fix a kitchen sink drain pipe. Common solutions include tightening connections, replacing worn gaskets, or patching leaks.
Tackling a faulty kitchen sink drain pipe can seem daunting, but it can be a manageable DIY task with the right tools and guidance. Dealing with leaks, clogs, or corrosion promptly prevents water damage and maintains a hygienic kitchen environment.
Homeowners should equip themselves with basic plumbing knowledge to address such issues efficiently. The internet is full of resources offering step-by-step instructions for every type of kitchen sink repair, from sealing minor leaks to replacing sections of the drain pipe.
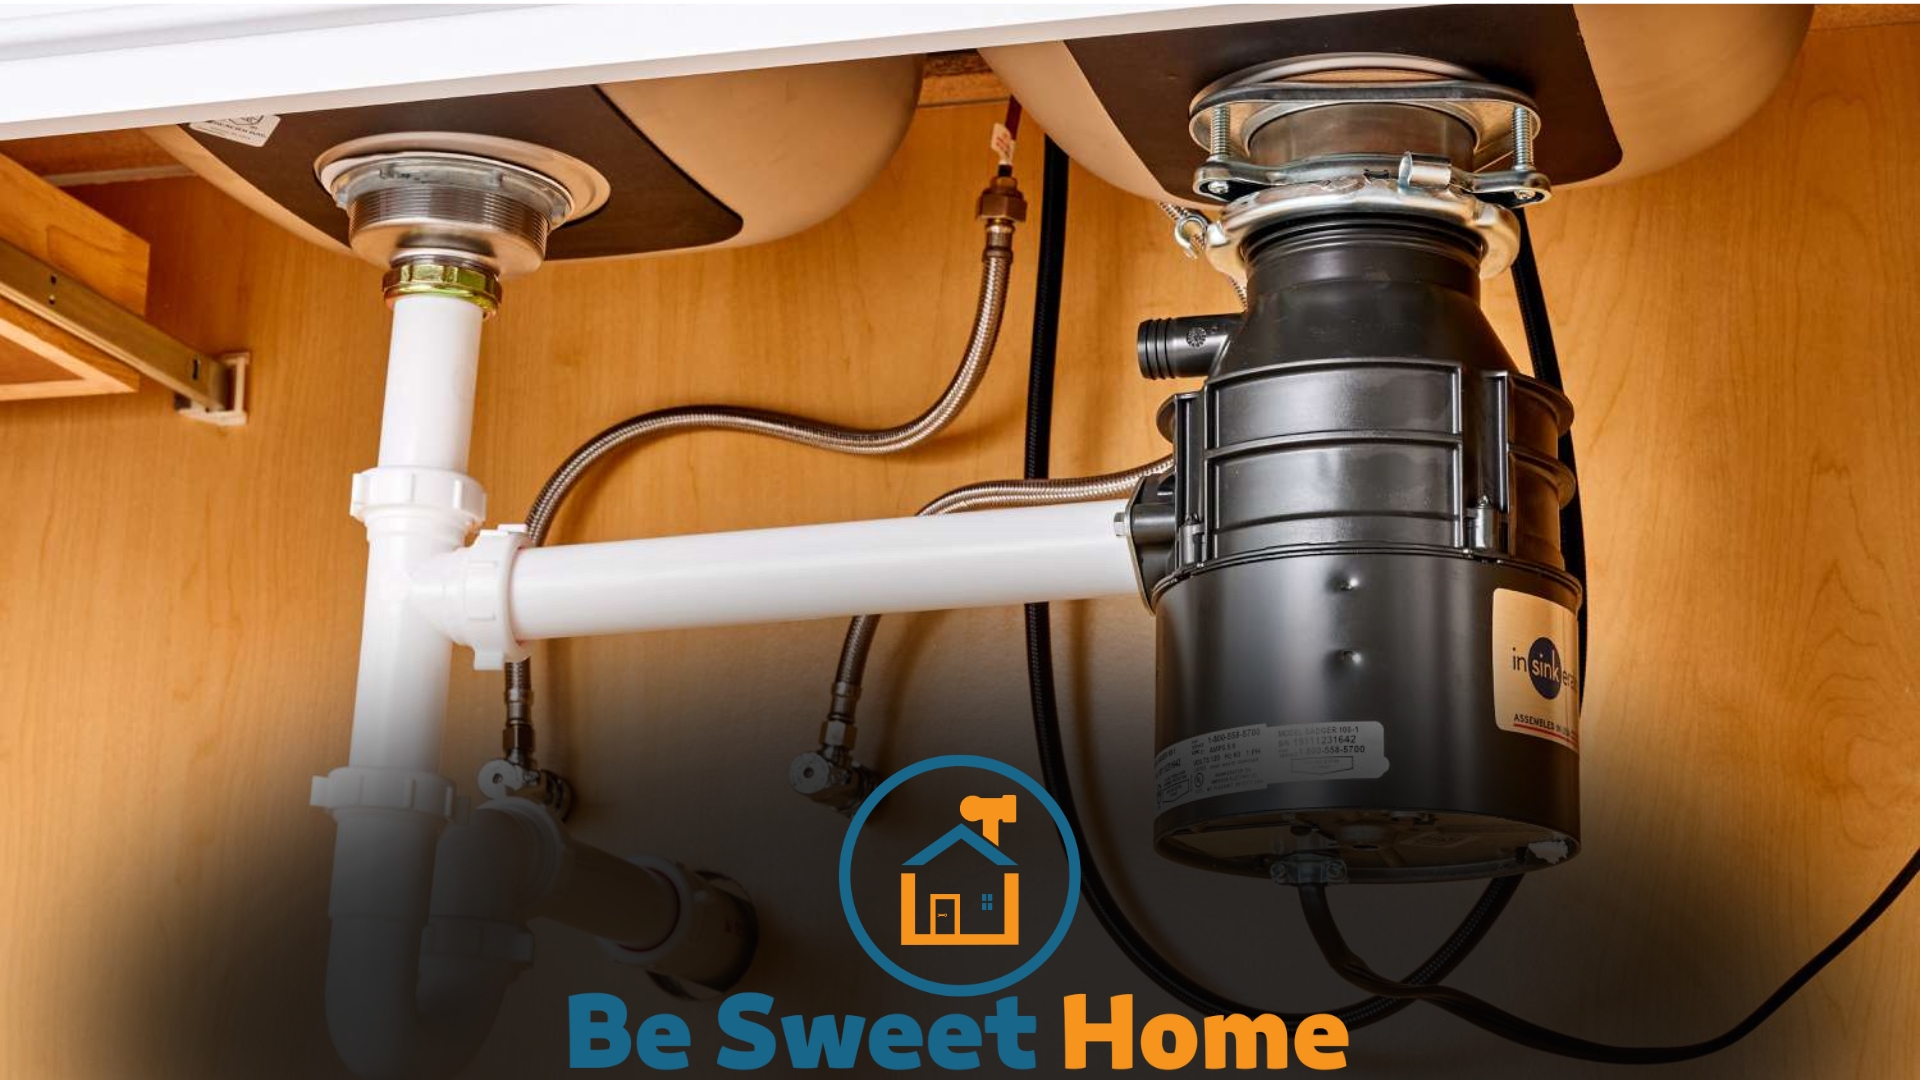
Understanding the structure of your sink’s plumbing – typically including a tailpiece, a P-trap, and the drain arm – is crucial before attempting any repairs.
Quick action and precise interventions can save money and avert the need for professional plumbing services.
Early Signs of Sink Drain Pipe Issues
Spotting early signs of sink drain pipe issues saves time and money. A kitchen sink is vital for daily chores. It needs attention when things go wrong. Knowing what to watch for helps prevent bigger problems.
Identifying Leaks and Clogs
Leaks and clogs disrupt the kitchen routine. Here’s what to look for:
- Water pooling under the sink
- Dampness or water stains inside the cabinet
- Slow-draining water indicates a clog
- Gurgling sounds after water flows down
- Unusual, persistent noise when the tap is on
These signs signal a need for action. Check pipes for wear and tear. A flashlight helps spot cracks or warping.
Warning Sounds and Odors
Odd sounds and smells coming from the sink are warnings. Listen and sniff for:
- A strong, musty odor suggests mold from leaks
- A rotten smell could mean food buildup in the pipes
- Bubbling or suction sounds when water drains
- Clanking metals signify loose pipes
These hints often precede clogs or larger issues. Taking action at this stage prevents extensive repairs.
Tools and Materials You’ll Need
Before tackling a kitchen sink drain pipe fix, it’s smart to have the right tools and materials ready. This ensures a swift and efficient repair.
In this section, we will explore the essentials needed for the job and supplementary items that could be useful.
Essential Tools for the Job
- Adjustable Wrench: To loosen and tighten nuts and fittings.
- Pipe Wrench: Gives extra torque for stubborn pipes.
- Plunger: Clears minor clogs.
- Hacksaw: Cuts through metal or plastic pipes if replacement is needed.
- Plumber’s Putty: Seals joints and prevents leaks.
- Teflon Tape: Ensures a watertight seal on threaded connections.
- Hand Gloves: Protect your hands during the process.
- Bucket: Catches water from the pipe during disassembly.
Supplementary Materials for Repair
- Replacement Pipes or Fittings: To replace damaged sections.
- Pipe Joint Compound: Additional sealing for threaded joints.
- Plumber’s Tape: To secure and seal threads.
- Silicone Caulk: An alternative to plumber’s putty for sealing.
- Drain Auger: (sometimes known as a Snake) Helps clear tough clogs deep in the drain.
- Tube Cutter: Provides a clean cut on pipes.
- Deburring Tool: Smooths out cut pipe edges.
Shutting Off the Water Supply
The water supply must be turned off before addressing any issues with your kitchen sink’s drainage pipe.
This essential step ensures a safe repair environment and prevents unwanted water flow during maintenance.
Steps To Locate and Turn Off Valves
Locating and turning off the valves of your kitchen sink is straightforward. Below are the necessary actions:
- Look under your sink for the water supply valves. You will typically find two valves – one for hot water and one for cold water.
- Turn each valve clockwise until it stops. This closes the valves and halts water flow to your sink.
- If you can’t find the valves, check your basement or near your water meter. Larger shut-off valves control the water to your entire home here.
- Once again, turn these valves clockwise to shut off the water supply.
Safety Precautions Before Starting
Safety comes first when handling plumbing. Take these precautions:
- Double-check that the valves are fully closed to avoid any water spillage.
- Clear out items under the sink to create a safe work area.
- Wear gloves and goggles to protect your hands and eyes during the repair.
- Keep a bucket nearby to catch any remaining water in the pipes.
- Ensure good lighting to see everything.
With these steps, you’re now ready to safely fix your kitchen sink drain pipe without the hassle of unexpected water flow.
Dismantling the Drain Pipe
Is your kitchen sink draining slow or blocked? Time to fix the drain pipe! Dismantling the drain pipe is a task you can do.
Here’s a simple guide to starting the process. With care and the right tools, this can be a smooth task. Let’s dive in!
Removing Connections and Traps
- Clear the cabinet: Remove everything under the sink.
- Place a bucket: Catch water that may spill.
- Loosen the nuts: Use pliers to turn the slip nuts counterclockwise.
- Remove the P-trap: The P-trap is the curved pipe. Pull it down gently after unscrewing.
- Check for clogs: Look inside the removed pipes for debris.
Handling Corrosion and Stuck Parts
Corroded or stuck pipes need extra care. Before trying to force them, apply these tips:
- Penetrating oil: Spray on corroded joints. Wait a few minutes.
- Gentle taps: Tap with a hammer to loosen the joints.
- Heat: Apply heat with a hairdryer or heat gun. Be cautious!
- Use a pipe wrench: Grip tighter on stubborn parts.
Stay patient. Don’t force anything too hard, as this may damage the pipes.
Repairing or Replacing the Pipe
Repairing or Replacing the Pipe under your kitchen sink might sound daunting, but with the right guidance and tools, it can be a straightforward task.
Whether you’re facing leaks or persistent clogging, examining the drain pipe is your first step. Sometimes, a simple repair will suffice. Other times, a replacement becomes necessary.
Let’s explore both options.
Sealing and Tightening Techniques
A leaky pipe often requires minor repairs. Begin by identifying where the leak originates. Sealing small gaps or cracks is essential. Use a wrench to tighten loose connections.
- Turn off the water supply.
- Clean the pipe area for a clear view of the issue.
- Apply the plumber’s putty or sealant around the leak.
- Wait for the sealant to dry as per the instructions.
- Re-check to ensure the leak is fixed.
Choosing the Right Replacement Parts
Choose parts that match your sink’s specifications if the damage requires a new pipe. Here’s a guide:
- Measure the pipe’s diameter and length.
- Find the exact material type: PVC, copper, or stainless steel.
- Consider using flexible fittings for easier installation.
- Purchase a pipe with a similar threading or connection type.
Once you have the parts, follow these steps:
- Turn off the water and disconnect the old pipe.
- Align the new pipe and secure it with the appropriate fittings.
- Check for leaks by running water through the system.
Reassembling and Testing the Drain
Say goodbye to sink issues with a solid fix for your drain pipe!
Reassembling and Testing the Drain are crucial steps.
They ensure everything is back in place and working properly.
Follow these simple, clear steps and perform the perfect DIY plumbing fix.
Steps To Reconnect the Drain Properly
- Gather your tools: You’ll need a wrench, plumber’s putty, and Teflon tape.
- Replace the gasket: Slide a new gasket onto the pipe near the sink.
- Apply Teflon tape: Wrap the threads of the pipe connectors with Teflon tape to prevent leaks.
- Reattach the pipes: Connect the pieces by hand and tighten them with a wrench.
- Secure the P-trap: Ensure the P-trap is aligned and tight.
- Add plumber’s putty: Apply plumber’s putty around the drain opening.
- Check all connections: Make sure everything is snug and aligned.
Final Checks for Leaks and Flow
Make sure everything is working with these final steps.
- Fill the sink: Use water to test the flow and drainage speed.
- Look for drips: Check underneath the sink for any water leaks.
- Listen: Silence is good. Noise could mean problems.
- Wipe connections: Check for wetness with a dry cloth.
A dry cabinet and a flowing sink mean success.
Frequently Asked Questions
What Causes Kitchen Sink Drain Pipe Leaks?
Kitchen sink drain pipe leaks often result from loose connections, corroded pipes, or worn-out seals and gaskets.
How To Diagnose a Leaky Sink Drain?
Check for moisture, stains, or drips under the sink, paying special attention to the drain assembly and pipe connectors.
Can I Fix a Sink Drain Pipe Myself?
Yes, with basic tools and a new pipe or gasket, you can typically fix a leaky sink drain pipe yourself.
What Tools Are Needed for Drain Pipe Repair?
You’ll need a wrench, plumber’s putty, knife, and replacement parts like washers or pipes to repair a drain pipe.
When Should I Call a Professional Plumber?
If the leak persists after your repair attempts or the damage appears extensive, it’s time to call a professional plumber.
Conclusion
Dealing with a kitchen sink drain pipe issue can be daunting, but armed with the right tips, it’s a task you can confidently tackle. Remember to double-check your work for leaks and ensure everything is securely fastened.
By following the steps outlined in this guide, you’ll easily restore your sink’s functionality and prevent future clogs.