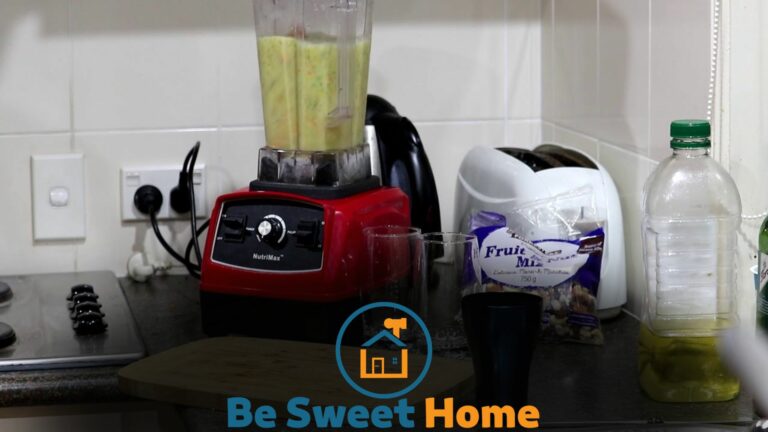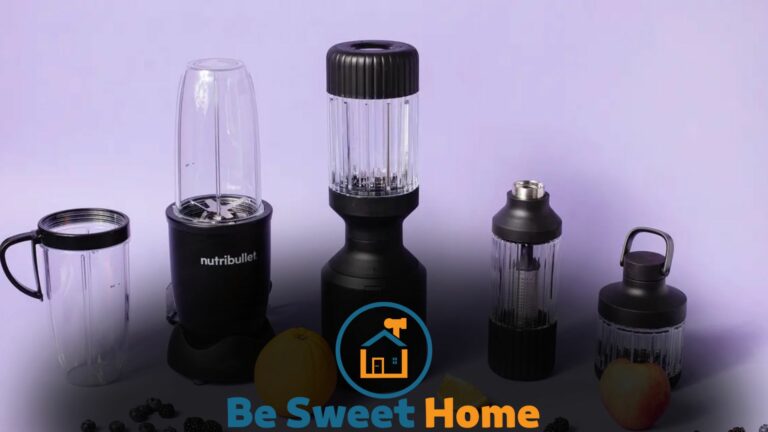

To clean a Breville blender, fill it halfway with warm water and a few drops of dish soap. Turn it on and blend for 30 seconds, then rinse well.
Cleaning your Breville blender is essential to maintain its performance and prolong lifespan. Whether you’ve used it to make smoothies, soups, or sauces, regular cleaning is necessary to remove any leftover residue and prevent the buildup of odors.
We will guide you through the simple and effective process of cleaning your Breville blender. By following these steps, you can ensure your blender stays in top shape and produces hygienic and delicious blends every time.
So, let’s dive in and learn how to clean your Breville blender easily for optimal performance and longevity.
Cleaning the Blender Jar
The jar is essential to your Breville blender and requires regular cleaning to ensure optimal performance and hygienic food preparation.
Cleaning the blender jar involves several steps, including removing and detaching the blender blade assembly, cleaning the lid, removing stubborn stains from the blender jar, and drying and assembling the blender jar.
Let’s dive into each step to learn how to clean your Breville blender effectively.
Removing and Detaching the Blender Blade Assembly
The first step in cleaning the blender jar is removing and detaching the blade assembly. This assembly consists of the cutting blades and the base that holds them in place. To remove the blade assembly, follow these simple steps:
- Unplug the blender from the power source to ensure safety.
- Hold the blender jar firmly with one hand.
- Twist the blender blade assembly counterclockwise with your free hand to unlock it from the jar.
- Gently lift the blade assembly from the blender jar and set it aside.
Cleaning the Blender Jar and Lid
Now that the blade assembly is removed, it’s time to clean the blender jar and lid. Follow these steps to achieve a sparkling clean result:
- Fill the sink or basin with warm water and a few drops of mild dish soap.
- Submerge the blender jar and lid in the soapy water.
- Using a soft sponge or cloth, scrub the inside and outside of the blender jar to remove any residue or food particles.
- Rinse the blender jar and lid thoroughly to remove any soap residue.
- Wipe the blender jar and lid dry with a clean towel.
Removing Stubborn Stains From the Blender Jar
Sometimes, the blender jar may develop stubborn stains that are harder to remove. Here’s what you can do to tackle those tough stains:
- Mix baking soda and water to create a paste until it forms a thick consistency.
- Apply the baking soda paste to the stained areas of the blender jar.
- Let the paste sit on the stains for a few minutes to allow it to penetrate.
- Scrub the stained areas with a sponge or a soft brush in circular motions.
- Rinse the blender jar thoroughly to remove any residue.
- Dry the blender jar with a clean towel.
Drying and Assembling the Blender Jar
After cleaning and removing any stains, it’s important to ensure the blender jar is completely dry before reassembling it. Follow these steps to dry and assemble the blender jar:
- Place the blender jar upside down on a clean dish rack or towel to allow air circulation.
- Let the blender jar air dry completely.
- Once dry, reattach the blender blade assembly by aligning it with the grooves on the blender jar.
- Twist the blade assembly clockwise until it locks into place.
Now that you know how to thoroughly clean your Breville blender’s jar, you can enjoy the benefits of a clean and well-maintained appliance.
Regular cleaning not only ensures optimal performance but also contributes to the longevity of your Breville blender.
Incorporate these cleaning steps into your routine, and you’ll have a blender ready to create delicious recipes whenever needed!
Cleaning the Blender Base and Controls
Keeping your Breville blender clean is essential for longevity and ensuring your blended creations taste their best. One of the key areas to focus on when cleaning your blender is the base and controls.
In this section, we will guide you through effectively cleaning the blender base and controls.
Unplugging and Disassembling the Blender Base
Before cleaning the blender base, unplug it from the power source to prevent any accidents.
Once that is done, you can begin disassembling the blender base by removing any attachments, such as the jar and lid. This will allow you to clean each component thoroughly.
Wiping Down the Blender Base and Controls
Wipe down the external surfaces with a damp cloth to begin cleaning the base and controls. This will help remove any dirt or residue that has accumulated.
Make sure to pay extra attention to the buttons, knobs, and any other controls on the blender base.
Removing Grime and Residue From the Blender Base
You can apply a mild cleaning solution if the base has stubborn grime or residue that cannot be removed with a damp cloth. Mix a solution of warm water and mild dish soap in a bowl and dip a soft sponge or cloth into it.
Gently scrub the base and controls, ensuring not to use abrasive materials that may scratch the surface.
| Materials needed: | – Warm water | – Mild dish soap | – Soft sponge or cloth |
|---|
Drying and Reassembling the Blender Base
After thoroughly cleaning the base and controls, dry them with a clean, lint-free cloth. Ensure that there is no moisture left on the surface. Once everything is dry, you can reassemble the blender base by attaching the jar and lid back onto it.
Following these simple steps, you can keep your Breville blender base and controls clean, ensuring optimal performance whenever you blend your favorite ingredients.
Remember to clean the blender base regularly to maintain its cleanliness and extend its lifespan.
Cleaning the Blender Accessories
When keeping your Breville blender in top shape, cleaning all its components regularly is essential. One important aspect of blender maintenance is cleaning the blender accessories.
In this section, we will guide you through removing and cleaning the blender accessories, whether you choose to do it by hand or in the dishwasher. We will also cover important tips for drying and storing the blender accessories to ensure longevity.
Removing and Cleaning Blender Accessories
Before cleaning your Breville blender accessories, unplug the blender from the power source to ensure safety. The first step is to remove the blender accessories, such as the blade assembly, the jug lid, and the tamper.
Cleaning Blender Accessories By Hand
If you prefer to clean your blender accessories by hand, follow these simple steps:
- Fill a sink or basin with warm water and a few drops of mild dish soap.
- Submerge the blender accessories in the soapy water and let them soak for a few minutes to loosen any residue.
- Using a brush with soft bristles, scrub the accessories gently, paying extra attention to the blades and any hard-to-reach areas.
- Rinse the accessories thoroughly under running water to remove any soap residue.
- Inspect each accessory to ensure they are clean and free from any leftover debris.
Once all the blender accessories are clean, you can set them aside to air dry or proceed to the next step and clean them in the dishwasher.
Cleaning Blender Accessories in the Dishwasher
If you prefer the convenience of using a dishwasher to clean your blender accessories, here’s what you need to do:
- Place the blender accessories in the dishwasher’s top rack, ensuring they are securely positioned to avoid damage.
- Remove any excess food or residue from the accessories before loading them into the dishwasher.
- Add other dishwasher-safe items, making sure not to overcrowd the dishwasher.
- Select a gentle or delicate cycle to avoid damaging the accessories.
- Once the dishwasher cycle is complete, remove the accessories and inspect them to ensure they are clean and free from any leftover debris.
Drying and Storing Blender Accessories
After cleaning your Breville blender accessories, it’s important to dry them properly before storing them to prevent mold or mildew growth. Here are some tips for drying and storing your blender accessories:
- Place the accessories on a clean dish towel or drying rack and allow them to air dry completely before storing.
- Ensure that all the accessories, especially the jug lid and blade assembly, are completely dry to prevent any moisture from being trapped.
- Once the accessories are dry, store them in a clean and dry cabinet or drawer to protect them from dust and moisture.
By following these simple steps for cleaning, drying, and storing your Breville blender accessories, you can ensure that they remain in optimal condition, ready to be used for your next blending adventure.
Deep Cleaning and Maintenance
Maintaining your Breville blender’s cleanliness is essential for its performance and longevity. Regular cleaning should be a part of your routine, but sometimes, a deeper cleaning is necessary to remove stubborn residue and ensure proper functionality.
In this section, we will discuss the steps for deep cleaning and maintenance of your Breville blender.
Periodic Deep Cleaning of the Blender
To keep your Breville blender spotless and running smoothly, periodic deep cleaning is required. The process is simple and will help remove any build-up from extended use. Follow these steps:
- Start by disassembling your blender and removing the blade assembly, jar, and lid.
- Wash the jar, lid, and blade assembly in warm, soapy water. You may also use a mild dishwashing detergent if necessary. Gently scrub these parts to remove any residue or stuck-on food particles.
- Rinse the parts thoroughly to ensure all soap residue is removed. Soap residue can affect the taste of your blended creations.
- Make a paste using baking soda and water for any stubborn stains or residue. Apply the paste to the affected areas, let it sit for a few minutes, and then scrub with a soft brush or sponge.
- Dry thoroughly before reassembling your blender once all the parts are clean.
Cleaning the Blender Seals and Gaskets
The seals and gaskets of your Breville blender play a crucial role in preventing leaks and maintaining a tight seal. It’s important to clean and inspect these components regularly to ensure their longevity. Here’s how:
- Remove the seals and gaskets from the jar and the blade assembly.
- Wash them in warm, soapy water, ensuring you reach all the crevices to remove any residue.
- Rinse the seals and gaskets thoroughly, taking extra care to remove any soap residue.
- Inspect the seals and gaskets for any signs of wear or damage. If you notice cracks, tears, or a loose fit, it’s time to replace them.
- Before reassembling your blender, ensure the seals and gaskets are completely dry.
Preventing Mold and Odor Build-up in the Blender
Preventing mold and odor build-up in your Breville blender is crucial for maintaining cleanliness and ensuring the taste of your blended beverages. Follow these tips to keep your blender fresh:
- After each use, thoroughly wash and dry the blender jar, lid, and blade assembly.
- Avoid leaving residue or liquid in the blender for extended periods.
- Store the blender with the lid off to allow proper airflow and prevent moisture accumulation.
- Regularly check for any signs of mold growth or unpleasant odors. Follow the deep cleaning steps mentioned earlier to eliminate them if you notice.
Maintaining the Performance and Longevity of the Blender
To ensure your Breville blender continues to perform optimally and lasts for years to come, make these habits a part of your blender’s regular maintenance:
- Regularly inspect the power cord for any damage and replace it if necessary.
- Wipe the blender’s base with a damp cloth to remove dust or spills.
- Keep the blender in a cool and dry place to prevent moisture damage.
- Refer to the manufacturer’s instructions for any specific maintenance recommendations.
By following these cleaning and maintenance tips, you’ll ensure that your Breville blender remains in top-notch condition, delivering smooth and delicious blends every time you use it.
Tips and Tricks for Blender Maintenance
Maintaining the cleanliness of your Breville blender is essential to ensure its optimal performance and longevity. Regular cleaning helps prevent residue buildup and keeps your blender looking and smelling fresh.
In this section, we will delve into some valuable tips and tricks for blender maintenance, including establishing a regular cleaning routine, using vinegar or baking soda for stubborn stains, cleaning the blender after each use for hygiene, and troubleshooting common blender cleaning issues.
Regular Cleaning Routine for Optimal Performance
To keep your Breville blender in top-notch condition, it’s crucial to establish a regular cleaning routine. Consistency is key here. After every use, take a few minutes to clean your blender thoroughly.
Here’s a simple step-by-step process you can follow:
- First, unplug the blender from the power source to ensure safety.
- Disassemble the blender by removing the blade, gasket, and other detachable parts.
- Rinse the detachable parts under warm running water to remove any immediate residues.
- Create a cleaning solution by mixing warm water with a mild dish soap.
- Using a non-abrasive sponge or brush, gently scrub the blender jar, lid, and other parts with the cleaning solution.
- Rinse all the parts thoroughly with warm water to remove any soap residue.
- Allow the parts to air dry completely before reassembling the blender.
- Once the parts are dry, reattach them to the base, ensuring they are properly aligned and secured.
- Your Breville blender is now ready to be used again!
Using Vinegar or Baking Soda for Stubborn Stains
Incorporating vinegar or baking soda into your cleaning routine can be highly effective if you encounter stubborn stains or lingering odors in your blender.
- Create a mixture of equal parts water and vinegar or baking soda.
- Fill the blender jar with the mixture until it reaches halfway.
- Blend the solution for a few minutes on a low setting.
- Allow the mixture to sit in the blender jar for approximately 15 minutes.
- Afterward, rinse the blender jar thoroughly with warm water.
- Repeat the rinsing process until no trace of vinegar or baking soda is left.
- Your blender should now be free from stubborn stains and unpleasant odors.
Cleaning Blender After Each Use for Hygiene
Maintaining a clean and hygienic blender is crucial for your well-being. Cleaning your blender thoroughly after each use ensures that no contaminants or harmful bacteria accumulate and transfer into your food or beverages.
Here’s a quick post-use cleaning routine you can follow:
- Immediately after use, disassemble the blender by removing the blade, gasket, and other detachable parts.
- Rinse the parts under warm running water to remove any immediate residues.
- Using a mild dish soap, clean the parts with a non-abrasive sponge or brush, ensuring all food remnants are removed.
- Rinse the parts thoroughly with warm water to eliminate any soap residue.
- Air dry the parts completely before reassembling the blender.
- Once dry, reattach the parts to the base, ensuring they are properly aligned and secured.
- Your blender is ready for the next use, and you can have peace of mind knowing it’s clean and hygienic.
Troubleshooting Common Blender Cleaning Issues
Despite following the cleaning routines diligently, you might encounter specific issues or challenges while cleaning your blender.
Let’s look at some of the common problems and their solutions:
| Issue | Solution |
|---|---|
| The blender base is not coming clean | Detach the base from the power source and wipe it down with a damp cloth. Avoid submerging the base in water to prevent damage to the electrical components. |
| Stains or residues on the blender jar | Try soaking the blender jar in a mixture of warm water and vinegar or baking soda for a while, then scrub with a non-abrasive sponge. |
| The blender blade is difficult to clean | Dismantle the blade carefully, and using a small brush (e.g., an old toothbrush), clean all the nooks and crannies. Be cautious when handling the sharp blades. |
| Lingering odors | For persistent odors, blend a mixture of warm water and lemon juice, then rinse thoroughly. |
By following these handy tips and troubleshooting common cleaning issues, you can ensure your Breville blender stays pristine, guaranteeing optimal performance and hygiene every time you use it.
Conclusion
Cleaning your Breville Blender is essential to ensure its longevity and optimal performance. By following the simple steps mentioned in this blog post, you can easily maintain cleanliness and hygiene in your kitchen.
Regular cleaning prevents build-up of residue and food particles, ensuring safe and healthy blending.
Remember, a clean blender is a happy blender! So, make it a habit to clean your Breville Blender after each use, and enjoy delicious and nutritious blends every time.

