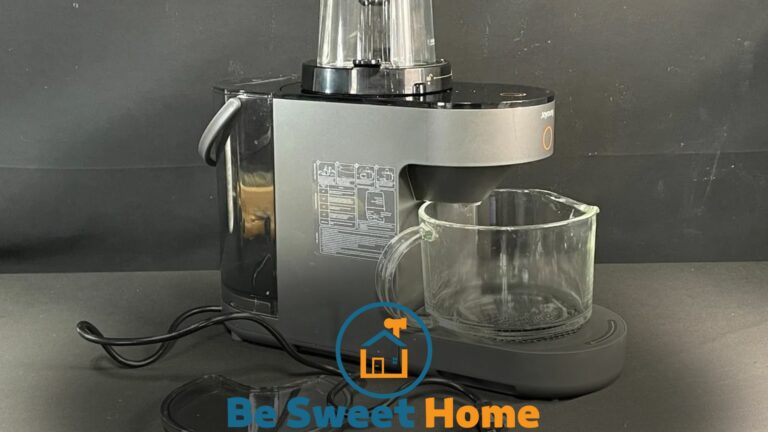

The Greecho Portable Blender instructions are simple and easy to follow. We will provide a concise guide on using the blender effectively, ensuring you can enjoy your favorite drinks on the go.
Whether you’re a fitness enthusiast, a traveler, or simply looking for a convenient way to blend your beverages, the Greecho Portable Blender is a great choice.
With its compact design and powerful blending capabilities, this portable blender lets you quickly whip up smoothies, protein shakes, and more.
So, let’s dive into the instructions and get started on your blending journey.
Getting Started With the Greecho Portable Blender
If you are looking for a convenient and efficient way to incorporate healthy smoothies and fresh drinks into your daily routine, the Greecho Portable Blender is the perfect solution.
With its compact design and powerful blending capabilities, this portable blender lets you enjoy delicious drinks wherever you go.
In this guide, we will walk you through the process of getting started with the Greecho Portable Blender, from unboxing to charging and assembling the blender. Let’s dive in!
Unboxing the Greecho Portable Blender
When your Greecho Portable Blender arrives, unboxing it is the first step towards unlocking a world of refreshing drink possibilities. Follow these simple instructions:
- Carefully remove the packaging, ensuring it does not damage any components.
- Gently lift the lid and set it aside.
- Take out the blender jar and set it on a stable surface.
- Remove the base from the packaging and place it nearby.
Checking the Contents of the Package
Before proceeding any further, it’s important to verify that all necessary items are included in the package. Here’s what you should find:
| Components | Quantity |
|---|---|
| Greecho Portable Blender Base | 1 |
| Greecho Blender Jar | 1 |
| USB Charging Cable | 1 |
| User Manual | 1 |
Ensure that all components are present and undamaged. Kindly contact customer support for assistance if any items are missing or damaged.
Familiarizing Yourself With the Blender’s Components
Now that you have unboxed the Greecho Portable Blender and checked the contents, it’s time to familiarize yourself with its main components.
Understanding the various parts of the blender will make the assembly process much easier. Here are the key components:
- Greecho Portable Blender Base: This is the main power unit that houses the motor and controls.
- Greecho Blender Jar: This transparent jar is where you will blend your ingredients.
- Blending Blades: The blades are located at the bottom of the blender jar and are responsible for chopping and blending.
- Lid: The lid securely seals the blender jar during operation to prevent spills or leaks.
- USB Charging Port: This is where the charging cable will be connected to charge the blender.
Take a moment to examine these components, ensuring you clearly understand their purpose and function.
Assembling the Greecho Portable Blender
Now that you are familiar with the components, it’s time to assemble the Greecho Portable Blender to be ready for use. Follow these steps:
Attaching the Blender Jar to the Base
- Place the Greecho Portable Blender Base on a flat and stable surface.
- Take the Greecho Blender Jar and align its bottom with the base.
- Gently twist the jar clockwise until it fits snugly onto the base.
Locking the Jar Securely
Ensuring the jar is securely locked is essential for safe and efficient blending. Follow these instructions:
- Rotate the jar counterclockwise until it clicks and locks into place.
- Ensure that the jar is tightly secured and does not wobble.
Charging the Greecho Portable Blender
It needs to be charged before you can use your Greecho Portable Blender. Here’s what you need to do:
- Locate the USB Charging Port on the Greecho Portable Blender Base.
- Connect one end of the USB Charging Cable to a power source, such as a computer or wall adapter.
- Insert the other end of the USB Charging Cable into the charging port of the blender base.
- Ensure that the connection is secure.
To check the battery level of the Greecho Portable Blender, refer to the battery level indicator. A fully charged blender will display all battery bars, indicating maximum power.
Now that you have unboxed, assembled, and charged your Greecho Portable Blender, you can start blending.
Stay tuned for our next blog post to explore delicious and nutritious recipes to kickstart your blending journey with the Greecho Portable Blender!
Blending With the Greecho Portable Blender
The Greecho Portable Blender is a versatile kitchen appliance that allows you to create delicious and nutritious beverages wherever you go.
Whether at home, on the go, or at work, this compact blender provides the convenience and power to blend your favorite ingredients and enjoy a refreshing smoothie or shake.
This section will explore the step-by-step instructions for blending with the Greecho Portable Blender, highlighting important factors such as adding ingredients, understanding the blender’s capacity, operating the device, and blending techniques and recipes.
Adding Ingredients to the Blender
Before you start blending with the Greecho Portable Blender, it’s important to ensure you have the right ingredients on hand.
Whether you’re looking to make a fruity smoothie, a protein shake, or a delicious milkshake, selecting the right ingredients is essential for achieving the desired taste and texture.
- Gather all your preferred ingredients, such as fresh fruits, vegetables, nuts, seeds, and liquid (water, milk, and yogurt).
- Wash and chop the fruits and vegetables into smaller pieces for easier blending.
- Add the ingredients into the blender jar, starting with the liquid first.
- Remember not to exceed the maximum capacity of the blender jar to ensure proper blending.
Understanding the Maximum Capacity of the Blender Jar
The Greecho Portable Blender is designed to handle a specific amount of ingredients to ensure optimal performance and avoid any potential spillage or damage to the device.
It is crucial to adhere to the maximum capacity guidelines to achieve consistent and smooth blends.
| Blender Model | Maximum Capacity |
|---|---|
| Greecho Portable Blender R1 | 12 oz (350 ml) |
| Greecho Portable Blender S1 | 15 oz (450 ml) |
| Greecho Portable Blender X1 | 16 oz (500 ml) |
Operating the Greecho Portable Blender
To start the blending process, power the Greecho Portable Blender, select the desired blending speed and adjust the timer according to the recipe requirements.
Powering on the Blender
To power the Greecho Portable Blender, press and hold the power button on the front panel. The LED indicator will light up, indicating that the blender is ready to use.
Selecting the Blending Speed
The Greecho Portable Blender offers multiple blending speeds to accommodate different ingredients and recipes.
Adjust the speed by pressing the speed control buttons, allowing you to blend smoothly or create a pulsing effect for ingredients that require more rigorous chopping.
Experiment with different settings to find the perfect speed for your desired consistency.
Adjusting the Timer for Different Recipes
The timer function on the Greecho Portable Blender allows you to control the blending duration precisely. By default, the blender is set to a 40-second blending cycle.
To adjust the timer, press the timer button and use the plus and minus buttons to increase or decrease the blending time.
This feature is particularly useful when following recipes requiring a specific blending duration.
Blending Techniques and Recipes
To achieve smooth and consistent blends with the Greecho Portable Blender, certain techniques and recipes can help enhance your blending experience.
Tips for Achieving Smooth and Consistent Blends
- Ensure all ingredients are properly chopped and evenly distributed in the blender jar.
- Avoid overfilling the blender jar to prevent uneven blending and spillage.
- Add a small amount of liquid at a time to help facilitate the blending process.
- For ingredients with a harder texture, consider pre-soaking or pre-chopping them to ease the blending process.
Trying Out Popular Recipes With the Greecho Portable Blender
The Greecho Portable Blender opens a world of possibilities for creating delicious and healthy beverages. Here are a few popular recipes to get you started:
- Green Smoothie: Blend spinach, kale, banana, apple, and coconut water for a nutritious green smoothie packed with vitamins and minerals.
- Protein Shake: Combine your favorite protein powder, almond milk, a banana, and a spoonful of nut butter for a post-workout shake that fuels your body.
- Strawberry Yogurt Smoothie: Mix fresh strawberries, Greek yogurt, honey, and orange juice for a refreshing and creamy summer smoothie.
Cleaning and Maintaining the Greecho Portable Blender
Keeping your Greecho Portable Blender clean and well-maintained is essential to ensure it continues functioning at its best, providing you with delicious and healthy smoothies on the go.
In this section, we will guide you through properly cleaning and maintaining your blender. From disassembling the blender for cleaning to drying and storing it, we will cover all the necessary steps.
By following these instructions, you can extend the lifespan of your Greecho Portable Blender and enjoy its impeccable performance for years to come.
Disassembling the Blender for Cleaning
Before cleaning your Greecho Portable Blender, you need to disassemble it properly. This allows for thorough cleaning of all the components. Here is how you can do it:
1. Removing the Blender Jar from the Base
First, ensure the blender is turned off and unplugged from the power source. Firmly hold the base with one hand while using your other hand to twist the blender jar counterclockwise until it detaches from the base.
2. Detaching the Blade Assembly
You can detach the blade assembly once you have removed the blender jar. Grasp the blade assembly firmly and twist it counterclockwise to separate it from the jar. Be cautious, as the blades are sharp. Place the blade assembly aside for cleaning.
Washing the Blender Components
After disassembling the Greecho Portable Blender, it’s time to wash the individual components to ensure they are squeaky clean and free from any residue. Here’s how to do it:
1. Cleaning the Blender Jar and Lid
Hand wash the blender jar and lid using a mild detergent and warm water. Scrub gently with a sponge or a soft brush to remove leftover food particles or stains. Rinse thoroughly with clean water to ensure no detergent is left behind.
Avoid submerging the base of the blender jar in water to prevent damage to its electrical components.
2. Washing the Blade Assembly and Rubber Gasket
After detaching the blade assembly, it’s important to wash it separately to ensure thorough cleaning.
Carefully wash the blades and rubber gasket under running water, using a brush to remove any residue. Pay extra attention to the areas around the blades to remove any trapped food particles.
Once cleaned, thoroughly clean the blade assembly and rubber gasket and allow them to air dry.
Drying and Storing the Greecho Portable Blender
Once all the components of your Greecho Portable Blender are clean, it’s essential to dry and store them properly to maintain their longevity. Here’s what you need to do:
1. Air-drying the Blender Components
After washing, place all the blender’s components on a clean and dry surface, including the jar, lid, and blade assembly.
Allow them to air-dry completely to prevent moisture from getting trapped and causing unpleasant odors or mold. Avoid using a cloth or towel to dry the components, as they may leave lint behind.
2. Properly Storing the Blender to Maintain Longevity
To ensure your Greecho Portable Blender stays in optimal condition between uses, it’s important to store it correctly. Place the dry and assembled blender away from direct sunlight in a cool and dry location.
Avoid storing the blender with the lid tightly sealed to allow for proper ventilation and prevent the growth of bacteria. Additionally, ensure no heavy objects are placed on top of the blender to avoid any damage.
Troubleshooting and Faqs
We’ve got you covered if you need troubleshooting or have common questions about using the Greecho Portable Blender.
Our FAQs section provides clear and concise instructions to help you maximize your portable blender experience.
Addressing Common Issues With the Greecho Portable Blender
If you encounter any issues while using the Greecho Portable Blender, don’t worry. In this section, we will address some common problems and provide you with troubleshooting tips to get your blender working perfectly. Read on to resolve any concerns you may have.
Blender Not Turning On
If your Greecho Portable Blender is not turning on, there are a few possible reasons. Here are some troubleshooting tips to help you resolve the issue:
- Make sure the blender is properly connected to a power source. Check if the power cable is securely plugged in.
- Ensure the power button is pressed firmly and held to power on the blender for a few seconds.
- Check if the blender is charged. If not, connect it to a power source using the provided USB cable and let it charge for a sufficient time.
- If the above steps don’t work, try resetting the blender by pressing the reset button located at the bottom of the blender base. Use a small, pointed object like a paperclip to press and hold the reset button for a few seconds.
- If none of the above solutions work, don’t hesitate to contact our customer support for further assistance.
Blender Leaking During Blending
If you notice that your Greecho Portable Blender is leaking during blending, follow these troubleshooting tips to fix the issue:
- Ensure that the blender cup is tightly screwed onto the blender base. Check if the cup is securely attached.
- Make sure you are not overfilling the blender cup. Refer to the maximum fill line indicated on the cup and avoid exceeding it.
- Check for any cracks or damage on the blender cup or base. If you find any, discontinue use and contact our customer support for a replacement.
- Ensure that the blender lid is properly sealed. Double-check if the lid is securely attached and positioned correctly.
- If the leakage persists, it may be due to a faulty gasket. Contact our customer support for a replacement gasket or further assistance.
Frequently Asked Questions
Here are answers to some frequently asked questions regarding the Greecho Portable Blender:
Can the Blender Blend Hot Ingredients?
Yes, the Greecho Portable Blender is designed to handle hot ingredients. It uses high-quality, heat-resistant materials that can withstand temperatures up to [insert specific temperature]. Whether you want to blend soups, hot beverages, or other heated ingredients, the Greecho Portable Blender is up to the task.
Is the Blender Compatible With All Power Sources?
The Greecho Portable Blender is compatible with a wide range of power sources. It can be powered using a standard wall outlet, a power bank, a laptop, or any other USB-compatible power source. This versatility makes it convenient for home and on the go, allowing you to enjoy your favorite beverages and blends wherever you are.
Conclusion
The Greecho Portable Blender is an innovative and convenient kitchen gadget that allows you to blend your favorite smoothies and drinks on the go.
Its compact size and powerful blending capabilities make it perfect for everyday use or for taking with you on your outdoor adventures.
By following the easy-to-understand instructions provided, you can enjoy the benefits of this portable blender and add a touch of health and freshness to your daily routine.
So why wait? Get your Greecho Portable Blender today and start blending your way to a healthier lifestyle.

